How to Replace Damaged Aviation Cable: A Step-by-Step Guide for Aircraft Safety
Damaged aviation cable is an urgent safety concern. Control cables are the vital link transmitting pilot inputs to critical flight control surfaces and other systems. Timely and correct replacement is paramount for airworthiness. This comprehensive guide details the professional procedures involved.
Understanding Aviation Cables & Recognizing Damage
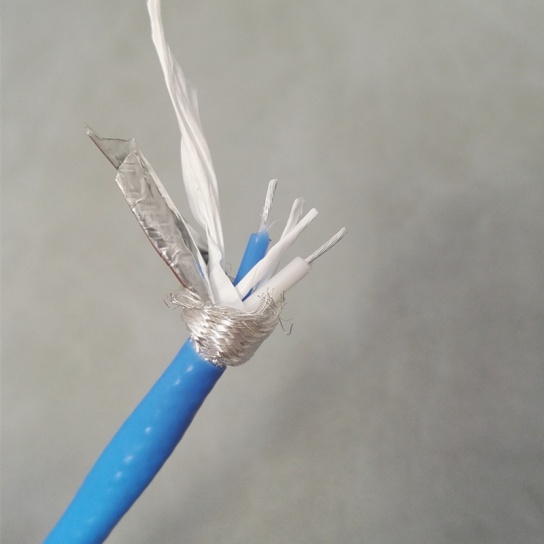
- Types: Aircraft primarily use stranded flexible steel cable (FSC) or corrosion-resistant steel cable (CRES). Size is designated by a number (e.g., 1/8″ cable is 1×19 or 7×7), and specific cables are chosen for their application (aileron, rudder, elevator, throttle, flap, etc.).
- Common Damage: Look for:
- Broken Strands: The most frequent indicator. More than a few broken strands within a critical section usually mandates replacement (follow the Aircraft Maintenance Manual – AMM).
- Corrosion: Rust, pitting, or discoloration significantly weakens cable.
- Kinks or Sharp Bends: Permanent deformation that compromises tensile strength.
- Wear: Excessive abrasion (often at pulleys, fairleads, or through structures) thinning the cable diameter.
- Birdcaging: Strands flaring out due to overloading or improper swaging.
- Crushed or Flattened Sections.
Essential Tools & Equipment
- Specialized Cable Cutters: Prevent damage to cable ends during cutting. Ordinary bolt cutters fray strands.
- Swaging Tool: For crimping cable terminals (sleeves, swayed forks, studs). Must be calibrated for the specific cable and terminal size.
- Terminals: New AN/MS/FAA-PMA certified terminals matching the cable specification (sleeves, thimbles, forks, eye ends).
- Cable Tensiometer: Critical for measuring and setting correct cable tension post-installation.
- Torque Wrench: For securing turnbuckles and terminal hardware to spec.
- Safety Wire & Pliers: For securing turnbuckles and terminals.
- Calipers: Measuring cable diameter and terminal crimp dimensions.
- Rag & Aviation Cable Lubricant: For cleaning and lubrication where permitted.
- Reference Documentation: AMM, Illustrated Parts Catalog (IPC), Component Maintenance Manual (CMM), and relevant FAA Advisory Circulars (e.g., AC 43.13-1B).
- Personal Protective Equipment (PPE): Safety glasses, gloves.
Step-by-Step Replacement Procedure
1. Preparation & Safety First:
- Secure Aircraft: Jack as required, chock wheels, and ensure the relevant control system cannot move unexpectedly.
- Reference the AMM: This is non-negotiable. Identify the exact cable part number, routing, required tension, terminal types, and any special procedures for your specific aircraft model. Never deviate without approved data.
- Tag Control Surfaces: Mark neutral positions to aid in rigging.
- Inspect Surrounding Areas: Check pulleys, fairleads, and bellcranks for wear, damage, or misalignment that could cause the new cable to fail prematurely. Replace or repair as necessary. Verify all hardware is serviceable.
- Documentation: Note cable routing before removal – photos are helpful.
2. Removing the Damaged Cable:
- Disconnect Terminals: Carefully remove safety wire and disconnect the cable at both ends (turnbuckle barrels, bellcrank fittings). Preserve hardware if reusable.
- Trace & Remove: Carefully guide the cable out of its routing path, releasing it from pulleys, fairleads, and guides. Note any grommets or protective sleeves.
- Inspect Hardware: Thoroughly inspect all fittings, turnbuckles, bolts, and washers removed. Replace anything worn, cracked, or corroded.
3. Preparing & Installing the New Cable:
- Verify New Cable: Confirm the replacement cable’s part number, material, size, and construction match the AMM specifications exactly.
- Route Carefully: Guide the new cable through the exact path used by the old cable, ensuring it passes correctly through all pulleys, fairleads, guides, and protective sleeves without twisting, kinking, or crossing. Do NOT force it.
- Lubrication (If Specified): Apply cable lubricant only if called for in the AMM/CMM. Over-lubrication can attract dirt.
- Measure & Cut: Ensure sufficient length at each end for terminal installation and rigging adjustment. Cut the cable cleanly using approved cable cutters only. Deburr ends carefully.
4. Installing Terminals (Swaging):
- Critical Step: Terminal installation must be flawless.
- Select Correct Terminal: Ensure terminal type and size match both the cable and the application (e.g., AN100 sleeve, AN665 eye, fork).
- Inspect Terminal: Verify no pre-existing damage.
- Position Cable: Insert cable fully into the terminal barrel until the cable end is flush with the end of the barrel.
- Set Swaging Tool: Use the correct die set for the terminal size. Ensure the tool is calibrated. Refer to tool instructions.
- Perform Swage: Apply the calibrated pressure/swage according to tool and terminal manufacturer instructions. Double-check the resulting “grip length” (visible strands beyond the sleeve) and finished crimp dimensions against specifications in AC 43.13-1B or manufacturer data. Look for neat, even crimps without cracks.
5. Rigging & Tensioning:
- Connect Terminals: Attach the new cable ends using the turnbuckle or direct fittings. Leave the turnbuckle approximately centered (equal threads showing on each side) for adjustment.
- Apply Initial Tension: Use the turnbuckle to remove obvious slack. Hand-tighten the locknuts/jamb nuts against the turnbuckle barrel.
- Measure Correct Tension: Attach a calibrated cable tensiometer to the free span of the cable according to its instructions. Measure distance from pulleys/fairleads as required. Adjust the turnbuckle until the measured tension matches the precise value specified in the AMM for the specific cable and flight control configuration (e.g., flaps up, controls neutral). Refer to the tension chart typically found in the AMM based on cable size.
- Torque Locknuts/Jamb Nuts: Securely tighten the locknuts against the turnbuckle barrel with a torque wrench to the AMM specification. This prevents unwanted rotation.
6. Final Inspection & Safety:
- Full Control Movement: Slowly and carefully move the control surface through its full travel range (per the AMM) to ensure smooth operation without binding, interference, or unexpected friction. Verify the cable runs correctly through all guides and pulleys under tension and movement.
- Terminal Security: Visually inspect all terminals and swages again. Ensure there is no slippage.
- Safety Wiring: Perform final safety wiring on all turnbuckles and terminals as required (e.g., turnbuckle ends wired together, terminal bolts safetied). Follow AC 43.13-1B standards.
- Documentation: Record the replacement in the aircraft maintenance logbook, including the part number of the new cable and terminals, work performed, and certification of return to service by a qualified mechanic (certifying statement required).
- Functional Check: As per AMM, often includes a full-flight control operational check to confirm correct function and freedom of movement.
Critical Considerations
- ADs and SBs: Always check for any applicable Airworthiness Directives (ADs) or Service Bulletins (SBs) related to the specific cable or installation.
- Professional Installation: This is not a DIY procedure. Only properly trained and certified mechanics holding the appropriate ratings should perform control cable replacement and rigging. Errors can have catastrophic consequences.
- Calibration: Swaging tools and tension meters must be calibrated regularly.
- One at a Time: When replacing interconnected cables (e.g., both aileron cables), replace and rig one cable completely before starting the next to maintain rigging reference points.
Conclusion
Replacing damaged aviation cable is a precise task demanding strict adherence to regulations, manufacturer data, and proven techniques. Safety is non-negotiable. By meticulously following the procedures outlined in the AMM, using calibrated tools, and employing skilled personnel, aircraft maintainers ensure the integrity of critical flight control systems and contribute directly to aviation safety. Never compromise on the quality of the cable, terminals, or the installation process itself. If in doubt about any step or requirement, always consult the official maintenance documents or seek guidance from experienced technical personnel.